Showing posts with label Iron Crafter. Show all posts

Monday, November 1, 2010

Top Ten!!!

Hey, guess what? 

I made the top 10 in the Iron Crafter with my baby sweater dress!


Go vote for me? 

Pretty please? 

Go here to vote!

Thank you so much!

<3 AmberLou

Monday, October 25, 2010

Sweater Conversion

Update! I made the Top 10 on the Iron Crafter! Go here to vote for me... pretty please?


There are fewer things that I love more than refashioning, or as my husband puts it "cutting apart perfectly good clothes... blah blah"

I knew he wouldn't mind this project though, 
because he {hates} this cardigan!


I'm a redhead, and I'll admit that it's not my best color, but his dislike of this sweater seems totally irrational to me!


anyways...

I love, love, LOVE sweater dresses on babies! 

and I have a baby girl...

I saw that the Iron Crafter's "Secret Ingredient" was sweaters... 

and I am so in love with the end result I could {die}!!!

First I got a knit shirt that is a bit big for my girl to use as a pattern


I cut out 2 pieces to use as the front and back, the whole length of the sweater.


Then I sewed them together along the sides and at the shoulders

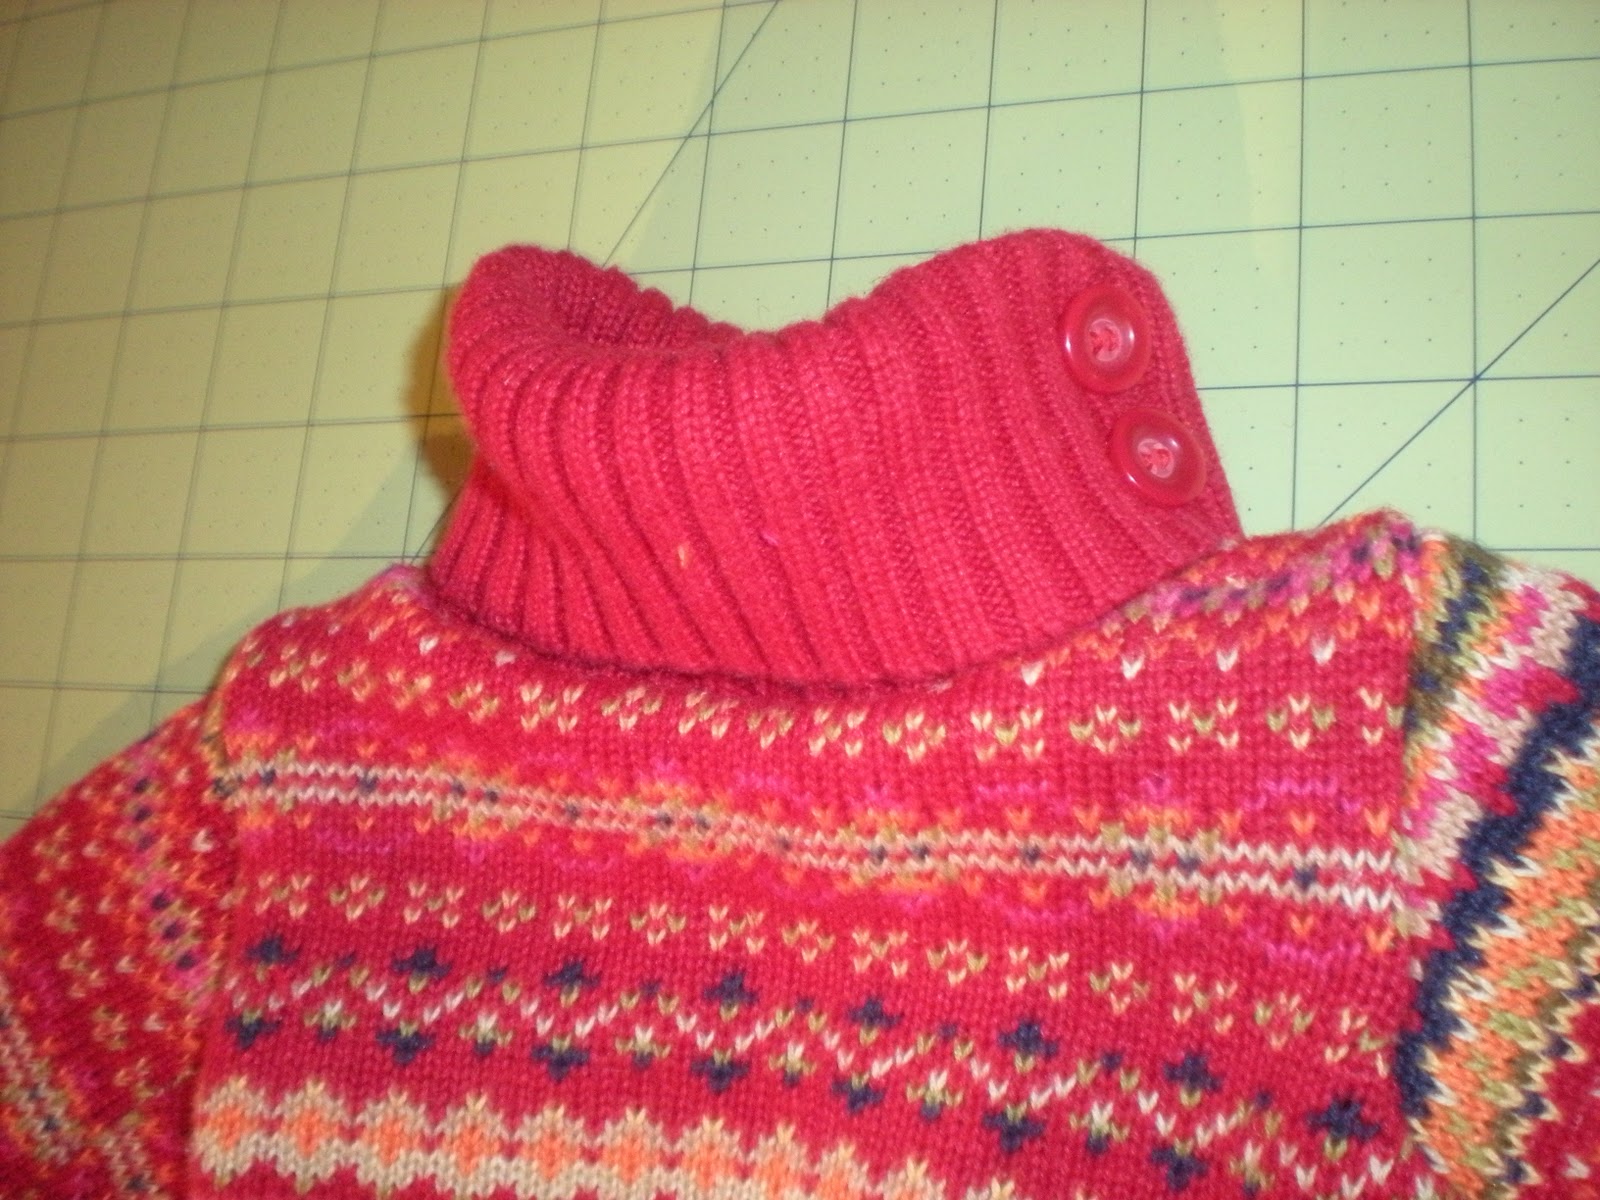
the sleeves of the original cardigan had this super cute button detail that I totally wanted to keep

so I lined up the sleeve of the baby sized shirt, with this along the top
and cut out the sleeves.

I sewed the sleeves into a tube, and attached them to the dress

here it is inside out...

Lastly I made the neck. I took the last piece of trim from around the bottom of the sweater and sewed it into a tube


and sewed it to the dress to make a little turtleneck!


I hand-sewed a few of the buttons from front of the old sweater onto the turtleneck to keep it from rolling up

I had to restrain myself from waking up the baby to try it on her...


(she woke up on her own eventually...)


I think this is my favorite refashioning project EVER!


p.s. I used a women's size Large for this project, and the end result is about 9-12 month size with very little left-over. If you make a sweater dress from this tutorial, please link it to our flickr group; I would LOVE to see it!

<3 AmberLou


sharing at a few of these parties

and

Thursday, August 26, 2010

Paint Sample Pumpkins


Here we go again! Its round 4 of the Iron Crafter and this time the secret ingredient was paint samples. I had to get in on it since I'm all about crafting for cheap...how much cheaper can free paint chips get???

I have been in the mood for fall. The weather here in Idaho has been rather cool the past few days and the brisk-ness plus being back on the University campus gave me the idea to get a head start on fall decor sooo, I give you:
The Paint Sample Pumpkins
To make this craft you will need some 4 chip paint samples [the longer the better.]
Ribbon {not pictured}

And some brads. Which might I add a ridiculously hard to find around these parts! So yes, your vision is correct...I bought brads that look like volleyballs! It was the largest I could find and I figured it doesnt really matter since they wont be visible on the finished product.

The next step is pretty simple. Poke the brad through the bottom of the paint samples.
I did 7 chips on the small pumpkin and 11 on the large one.
Open the brad so they dont all fall off!!!
It should look something like this:


Now do the same thing through the tops of the samples and open the brad when all are attached. It make a little ball that resembles a pumpkin. (I will admit I wasnt sure my idea was going to work but, when my 2 year old agreed that I indeed had made a pumpkin I knew I was on the right path. 2 year olds never lie:)

Using some green ribbon I knotted it and cut frays to make it have a stem and then, I too saw a cute lil pumpkin that will sit on my bookcase this fall.

For the larger pumpkin I used brown paint chips to make raffia and knotted and hot glued them to the top of the pumpkin.

I wish my camera was better, this is about the best shot I could get! Crafting possibilities are endless!!!
Enjoy making your own fall decor and go vote for me at fireflies and jellybeans!
-Amanda

Tuesday, August 3, 2010

HELP A FRIEND!


My post last week on 'Art that will make you sing' has made it to the top {14} finalists over at Fireflies & Jellybeans in the Iron Crafer Competition.
I SOOO badly want to win one of the aWeSoMe prizes and desperately need ya'll to vote.
Some of the other contestants have some really dedicated followers so lets show 'em up with support for 
The Paisley Cupcake!
It seriously take a few seconds to vote  SO...

If this project inspired you 

Let bloggerland know by casting your vote!
Thank You SO much...All of you inspire me everyday and give me the push to keep the creative juices flowing ;)

Have a FANTASTIC Tuesday!
-Amanda

Thursday, July 29, 2010

Art That Will Make You Sing.


I have a beautiful, antique piano that I like LOVE to play. There is nothing better {in my mind} than sitting down and expressing whatever Im feeling on the piano keys. 
However, there is one tiny problem.
My piano is a little bare. Usually, you walk into someone's home that has a piano and its covered with pictures and/or decor....I got nothing!
So I decided to change that and made a canvas {masterpiece!} haha.


To make your own canvas artwork you will need:
-3 6x12 stretched canvas
-5 pages of vellum [I used sand colored to make it look antiqu-ey]
-Mod Podge & paint brush
-Scissors to trim paper.
-decorative hinges
First thing to do is find some sheet music preferably with no words and print it onto your vellum. If it doesnt take all 5 pages, make an extra copy. (the paper only cover 3/4 of the canvas so you will be trimming the pages and matching it up on the bottom...hence, extra copies)
note: If you wanted to put this on a bookcase you could copy pages out of a book...I suggest Jane Austen:)

Next, pour Mod Podge on your blank canvas {as shown} and spread it around, even on the sides, with your paint brush.

 Then line up your vellum where you want it and press to the canvas and sides. [Vellum isn't as bendy so you may want to try using onion paper...which I couldnt find at our local stores.]
I liked the vellum because you have more colors to choose from and the way it bubbled made it look like old sheet music.
After you stick your paper to the canvas add Mod Podge to the top and smear around once more. It will create creases {which I wanted} but if you want it smooth...BE GENTLE!
Let it dry.
Then you will want to trim the edges if they hang over too far.
After that, using a screwdriver, screw in the hinges where you would like them.
You can set on top of your piano {or bookcase} and it looks like an open hymn book or even hang it on your wall.


easy as pie...and almost fool proof!


Dont judge by the pictures...I did it with my crappy camera phone!!! 
Happy Thursday!

504 Main