Showing posts with label Tutorials. Show all posts

Monday, May 30, 2011

The Life and Times of Stegosaurus Bob

My big boy celebrated his 5th birthday last week, and since making his piñata has sort of become my "thing", a few weeks ago I asked him what kind of piñata he wanted. 

A {stegosaurus}.

This is the third year I've made his birthday piñata. 

For his fourth birthday (pirate themed) the kiddies busted open a mean shark.


For his third birthday, a cute little red dragon. 


So I got busy and made him a stegosaurus.

How to Make a {Piñata}

You will need:

a plan!
balloons
newspaper
flour paste
paint


You don't have to draw a map of the pinata, but you should plan out what materials you're going to use to make it the shape you need. You can use pretty much anything that is lightweight.
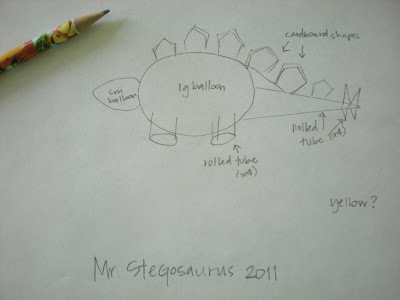


This little guy started out as two balloons. The balloons made up the cavity that holds all the candy, and everything else is just for looks. 

He is a large balloon and a small balloon


taped together.


Make your flour paste by mixing flour (I started out with 1 cup) and warm water until you have a fairly thick paste. Kind of the consistency of... um... snot.


I don't like working with big long strips of wet sticky newspaper, so I tear mine pretty short - about 6-8" long.


I use a small bowl to hold the piñata as I'm working with it. Since the balloons are round, they'll roll away if you don't have something to support them.


Start by one side of a strip of paper in the paste, and drag it along the edge of the paste bowl to remove the excess. 


I like a fairly thick-ish coating


and then stick it on your balloon. 


After I covered the large balloon, (leaving a hole to remove the balloons and add the candy), 


I made the neck


to connect the two balloons in a non-choppy way, just drape the strips from one to the other, and when you've gone all the way around, add a long strip the other direction.

After I covered both balloons, I set the guy up to dry. 


A few hours later, I added a second coat of newspaper to his whole body, and let him dry overnight. 
Here he is with two coats, totally dry.


The next morning, I made his tail, legs and spikes.  

I made his tail with a couple of sheets of construction paper. I made a tube and then used another sheet to bring the tube to a point.


I stuffed the tube with small balloons (water balloons) to keep it rigid while it dried. I cut small tabs all around the edge of where the tail meets the dino-bum , 


and glued and taped it onto the body.


Next I made the legs. I started with construction paper tubes, then cut a curved chunk out of the side to fit it to the side of Bob's body.


I cut tabs along the curved edge, and taped it on.


Repeat for all four legs. For the hind legs, I kept the outside edge longer, so the legs look more like stegosaurus legs. (Like I've ever seen any...)

I put small balloons in the legs to keep them rigid


then covered them with newspaper


It's starting to look like an animal now!

For the bony plates and spikes, I drew the shape I wanted on some lightweight cardboard (a soda box) and cut them out to attach. I left about a 1" tab along the bottom to use to attach it to the body.


I attached them along the length of the back


Then covered them in newspaper. 

After Bob dried completely, I painted him. Some people like to put crepe paper all over, but it is much less work to paint. I put on two coats to cover all the newsprint, and let it dry.


Last, I popped the balloons and removed them, then let the birthday boy fill the cavity up with candy, and patched the hole with a piece of construction paper, which I painted to match.

I rigged up a little harness out of string to hold Bob while the kiddies take turns smacking him. In years past, I've tried building in a wire hanger, but it always falls off... someday I will perfect a way to hold him up without string...


So in all, Bob has two layers of paper over his body, head and tail, and one over his legs. This makes a pretty strong piñata. I let each child have a turn smashing him, (starting with the youngest and going up by age) and blindfold the older kids so they don't kill him with one hit. After everyone has had one or two turns, I open it up to anyone who wants another turn (always the big kids) who crack him open after a few tries. 

Every year the kids fight over who gets to take the head home. Kinda morbid. 

I'm hoping for his sixth birthday, Mr. E asks for an octopus. Wouldn't that be great!? One balloon and streamers for the legs!

Remember: You can buy a piñata at Wal-Mart, but really - this is more fun! :)

<3 AmberLou


sharing at a few of these parties!

Tuesday, February 1, 2011

A Cute Valentines Gift


Last year, I wanted to do something on Valentines day for my daughter's Oma & Uncles.
She just loves them to death!
So I got crafty with:
-empty glass soda bottles [and the carrier thay came in.]
-craft paper and supplies.
-ribbon
-paint
-V-day candy

I covered each bottle with paper and ribbon and made a tag with each initial of my mom & siblings so they knew which was theirs.
I then filled them with assorted red, pink & white candies. [wash the bottles out first!]

I painted the 'Dads Root Beer' case with red paint just so it would cover any place where there wasn't any paper.
After it was dry, I decorated the case with paper and replaced the bottles and wall-ah. It was so simple and easy to make but it was adorable and a non-traditional way to deliver your Valentines treat.


Some candy that fit down the long neck bottle are:
-any kind of M&M's
-candy corn
-red hot candies
- candy hearts
-gumballs
There are too many too list.
You dont have to stick to the color theme in the candy if you dont want:)
-Amanda

Thursday, November 4, 2010

Ice Cream Cake Roll

My son requested a ice cream cake roll for his birthday. Here is the finished product - sort of. I was having camera issues and only had the cell phone camera to work with. This is much more appealing to look at - in real life. As I explain the procedure, I will tell you all my mistakes - so your outcome is less work.


Make your favorite chocolate cake batter and pour into a very well greased jelly roll (cookie sheet) pan -DO NOT USE A BOUGHT BOXED MIX (they rise too much). The cake will only have to bake approx. 15 minutes due to it being so thin. Have a prepared pillowcase or other woven cotton piece of fabric. Terry cloth does not work well at all. I use old pillowcases that have been washed well and bleached and only get used for this occasion. At the cake is baking sprinkle powdered sugar on the pillowcase in a rectangle about the size of the cake. When the cake is done-but fresh out of the oven ie. still hot, set it next to the sugared pillowcase. Use a spatula to make sure your cake isn't going to stick to the pan, slide it under the cake to dislodge sticky parts. Don't be arrogant here and think you greased the pan very well - cake has a mind of its own. But if it does tear - it is forgiving. Then flip the cake upside down (there will be a poof of sugar - I suggest wearing an apron or at least not dark clothing).


Lift off the pan ever so carefully - if the cake tears put pieces back together the best you can. Sprinkle the cake with powdered sugar - this keeps cloth from sticking to the cake. Gently begin rolling the cake up (remember...it is HOT!). Keep the roll loose. Put funny rolled log of cake aside until it is cool.

Take boxed (in a cube) ice cream from the freezer. Open the box up until it is flat. Slice the ice cream then let it sit a little while until it starts to soften - less than 10 minutes.

Gently unroll cake - not completely flat leave it a little curled so it will assume the rolled position again. Fit ice cream slices onto cake like a puzzle.

Use a warm knife to smooth ice cream over the cake, filling in gaps. No picture of this, sorry.

Carefully, roll cake back up into the log. Remove pillowcase from under cake - wrap tightly with plastic wrap (so not green - oops). Go around it, almost squishing it - like it is in need of a girdle. Wrap from end to end and stick in freezer for half and hour or more.


Remove from the freezer and gently unwrap. Cake roll should feel pretty solid at this point. Using some jarred hot fudge -'frost' the cake. You may need to microwave the hot fudge a little for spread-ability. This will look great sprinkled with some chopped walnuts if you like those - but son requested no nuts on top.

I have had this also without the fudge on top. but it looks pretty with a fresh, light dusting of powdered sugar.

I had a great picture of a slice so you could really see the spiral, but it is lost on the broken camera that is also short a USB cord, Nuts!!

Anyhow...I make pumpkin cake roll the same way except it is obviously a pumpkin cake that I fill it with cream cheese frosting.

A nice girlie ice cream roll can be made by... making a strawberry (pink) cake and fill with strawberry revel ice cream and then just frost with whipped cream and garnish with strawberry slices or pink sprinkles.

This is a fun activity to do with kids. They are always amazed how easy the cake comes together.

Enjoy!
~jan
PS. Thanks Rhonda Koyle for teaching me how to roll cakes - do I dare say - 20 years ago? You were right - now that I know how - I "will make them over and over". ~xoxo

I linked to...
http://bellavita-bellasblog.blogspot.com
http://www.thegirlcreative.com
http://www.simplysweethome.com
http://litandlaundry.blogspot.com/

Monday, October 25, 2010

Sweater Conversion

Update! I made the Top 10 on the Iron Crafter! Go here to vote for me... pretty please?


There are fewer things that I love more than refashioning, or as my husband puts it "cutting apart perfectly good clothes... blah blah"

I knew he wouldn't mind this project though, 
because he {hates} this cardigan!


I'm a redhead, and I'll admit that it's not my best color, but his dislike of this sweater seems totally irrational to me!


anyways...

I love, love, LOVE sweater dresses on babies! 

and I have a baby girl...

I saw that the Iron Crafter's "Secret Ingredient" was sweaters... 

and I am so in love with the end result I could {die}!!!

First I got a knit shirt that is a bit big for my girl to use as a pattern


I cut out 2 pieces to use as the front and back, the whole length of the sweater.


Then I sewed them together along the sides and at the shoulders

the sleeves of the original cardigan had this super cute button detail that I totally wanted to keep

so I lined up the sleeve of the baby sized shirt, with this along the top
and cut out the sleeves.

I sewed the sleeves into a tube, and attached them to the dress

here it is inside out...

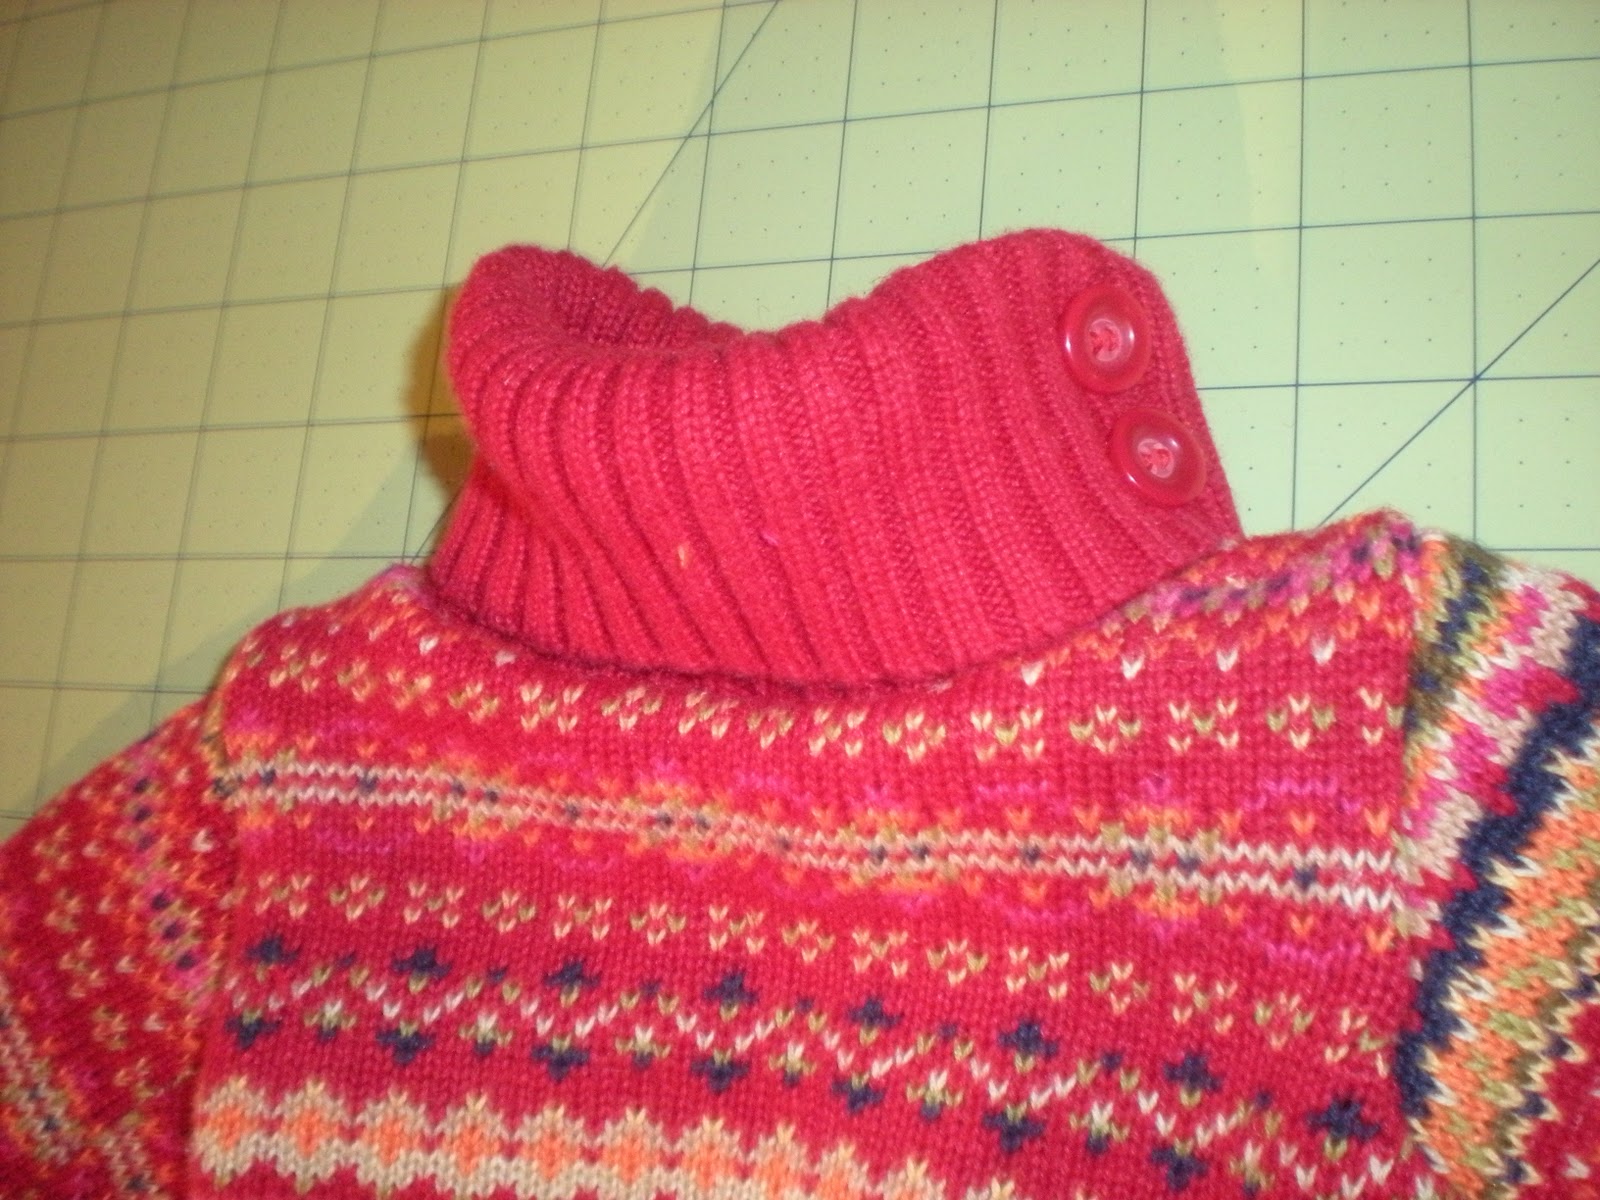
Lastly I made the neck. I took the last piece of trim from around the bottom of the sweater and sewed it into a tube


and sewed it to the dress to make a little turtleneck!


I hand-sewed a few of the buttons from front of the old sweater onto the turtleneck to keep it from rolling up

I had to restrain myself from waking up the baby to try it on her...


(she woke up on her own eventually...)


I think this is my favorite refashioning project EVER!


p.s. I used a women's size Large for this project, and the end result is about 9-12 month size with very little left-over. If you make a sweater dress from this tutorial, please link it to our flickr group; I would LOVE to see it!

<3 AmberLou


sharing at a few of these parties

and