Showing posts with label Accessories. Show all posts

Saturday, July 2, 2011

4th of July Duds: Cottage Home Sew-Along Reveal

I love, love, love Mz. I's new outfit.


I was hesitant about making this pattern, since the XS size was 2T-3T, and my little girl comfortably fits into 18m, but it was really easy to modify the pattern. When cutting out the top, I measured one of Mz. I's shirts whose length I liked, and adjusted the length of the cut piece. The width I figured would be fine - the design is 
more blouse-y than fitted. 


I love it!

The shorts were basically the same - I measured an existing pair that she had and modified the pattern slightly. I shortened the waist 
and legs, and brought the seams in about 1/2" to accommodate 
her tiny legs.


Love, love {L-O-V-E} the shorts! 
(and the little bows!)


(and this little bow, you can only see when she 
shows off her belly button!)

When listing the fabric requirements for this pattern, Lindsay promised there would be enough leftover for whatever accessories we wanted to make.


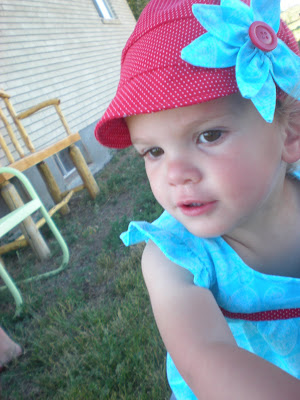
Mz. I has a serious love affair with hats. 
So I made her a newsboy girl(?) cap


I. Just. Love it!


Did I mention that this pattern, while complicated looking, was really quite simple?


Thank you Lindsay, for hosting this great sew-along!

<3 AmberLou


Hey! I'm one of the five finalists! Please go vote for this outfit here


sharing at some of these great parties!

Monday, August 30, 2010

Quilted Rag Baby Bibs

I saw this great tutorial at Creations by Kara a few weeks ago and HAD to make some of these for my girlie!

She shares a tutorial on making frayed edge bibs, and adding an appliqué. I used her technique for tracing an existing bib to make a pattern, and fraying the edges, but I made mine with coordinating fabrics, and pieced them together, and put a frayed edge along the center, edge, whatever of the bib. 

I heart how they turned out!


I also heart how I was able to make these with scraps from other flannel projects! 

(and I hate how my pics turned out... darn cloudy day!)

<3 AmberLou


sharing at some of these parties...

Monday, August 9, 2010

Batman Mask = {fail}

I have made several attempts to make my son a bat-child licensed character(TM) mask to go with the cool cape his Tutu made for him, and what can I say? I suck. 


Really, it's okay. Laugh. It looks terrible. This is attempt no. 2, and it is just plain awful. He can't breathe, the elastic pushes down his ears, I screwed up zig-zagging the eye holes, which are lopsided, so there are loose threads {everywhere}... 
oh and it makes him look like a retarded cat. 

My poor boy has been trying for a week to wear this to the grocery store, and I have no excuse not to let him, other than I don't want to admit that I {made} that thing! 

But he {really} wants a mask. 

It is apparently easier to fight crime when no one knows your true identity. Or something. 

I had an "Oh, duh!" moment at Herr Handsome's recent work party. 

Face paints. With magic markers. Oh, DUH!


Drew the outline of a mask


Filled it in. 

There are Mr. E's scary Batman eyes. I know, they're intimidating. 

And it washes. Right. Off. 

He went and looked in the mirror... and started to cry! (Tears {will} wash off the marker)

He wanted his mask to *look*like Batman.


All smiles! 

This also works waaaay better than eyeliner for drawing Captain Hook 'staches!


(slightly lopsided)

And it wipes off with a baby wipe. 


My life has suddenly become much less complicated! 

(Except for having to break out the magic markers every morning... but hey, {I} wear make-up everyday...)

<3 AmberLou


Shared at some of these parties

Visit thecsiproject.com

Friday, July 30, 2010

Straw leis

Before I get started, I just want to announce that I have a new grandchild!!! My second grandson and 3rd grandchild was born this week. We are so excited to have him finally here!! I'm sure I'll be posting pictures and stories in the weeks and months to come!

Now to the post...

Everyone knows that visitors to Hawaii are often greeted with a lei. What you might not know, is that there are many other occasions when leis are not only appropriate, they are almost mandated. We give them on birthdays, graduations, speaking engagements, retirements, promotions, mission farewells, special church meetings, homecomings, departures, after athletic events... you name it - any time someone is singled out, recognized or congratulated for any reason, he or she will be draped with leis by the end of the event. See my daughter and her boyfriend at their graduation a few years ago...


Frequently the leis are made from fresh flowers, but just as often, they will be handmade from other materials, including shells, beads, pearls, paper, candy, even money. Here is one type of lei you can make for your next Hawaiian themed party, birthday, Aloha shirt Friday etc.

To make this lei, you will need:

  • one ball of eyelash yarn (I used Lion Brand Fun Fur)
  • worsted weight yarn in a matching or contrasting color (you won't need a full skein)
  • 3 drinking straws
  • 1/8" ribbon in a coordinating color (may substitute worsted weight yarn)
  • 3/8" ribbon - you'll need about 12 inches
  • 2 kukui nuts or large wooden beads
  • craft wire
To begin, snip a small slit in one end of each of the drinking straws.

Then, measure out your ribbon (which will hold your lei together). You want three pieces that are each twice as long as your finished lei will be. Using the craft wire, thread the ribbon through the straws

and secure the end of the loop through the slit in the end of the straw like this:


Attach both types of yarn to one of the straws with a slip knot.
Then you will wrap the two strands of yarn around the straws, holding the yarn like this

pulling them into a knot like this
Wrap around the straw 3 times, then continue on the next straw, and the next wrapping each straw three times like this:


Continue wrapping around until the straws are full, then push the whole lot down onto the ribbons. Make sure you leave a little bit on the straw
then continue to wrap and push . If you need to set the project down to take care of something else, don't worry, it will be fine.

When your lei is the length you desire (or when all your yarn is used up...) slip the ends of the ribbon off the straws

And sew on a 6 inch piece of 3/8" ribbon for a tie on each end, trimming up the ends of the dangling ribbons. Slip the kukui nut or bead onto the tie and tie a knot to hold it on.

Trim the ends of the ribbon so they won't fray, then tie the ends together and you are done.

Inspired By Others #3

So, I love to keep an eye on the craft-blog world and when I see fabulous ideas...

I must make them mine!

Ruffles and Stuff has a super easy tute' on how to make bow-ties, and since I have a lovely {little} man who loves to accessorize... I made him one in every color! (okay, not EVERY color. Getting there) 


And of course he wears them to church!

I chopped off all those curls today... :(  

Have you seen the appliqued onesies over at Crap I've Made? Who doesn't {L-O-V-E} Wonder-Under?! 


My favorite is the iris. So sweet!


I shared this on Char's flickr group, and...


So exciting!


I am stoked to announce that we have added a flickr group at The Paisley Cupcake, and now if you fall in love and follow one of our tutorials, you can add it to our flickr page, and from time to time we'll share our faves! So please, share your musical art, your round bread, your baby tag toys and snake neckties! We'd LOVE to see them! Go here to link...

<3 AmberLou


I shared this at a few of these parties

Friday, July 9, 2010

Beaded Ponytailers

My dear friend Holly taught me to make these, oh so many years ago. Since I have 5 daughters, and they all had long hair for most of their lives, I made countless numbers of these. I made them for my girls, my nieces, my friend's daughters (remember getting these as a gift, Amanda?) my daughter's friends... I even sold a few. These are very easy to make with basic crocheting skills, and take less than an hour from start to finish.


You will need:


Cotton crochet thread (size 10) in the color of your choice
30-40 beads, pearls or stone chips to match or contrast your thread
Ponytail elastic (I recommend Goody brand)
#1 steel crochet hook


Note: the pattern below uses 30 beads. If you are using more or less than 30, you will need to adjust your number of stitches accordingly.


To begin, string your beads onto the thread, using a needle if necessary. (My younger daughters always liked to do this part for me).


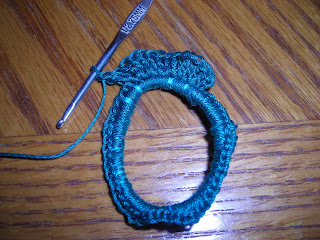
Then, single crochet (SC) around your elastic, making sure you cover up the loose end of your thread. It doesn't matter how many or how few stitches you use... cover it as much as you like.

Once it's covered, tie off the end.


This is the hardest part. I like to do several at a time, and save the rest of the job for a time when I don't want to have to pay a lot of attention... like in the car or while I'm watching TV.


Next, pick up the end of the thread and ch 3, then work 2 double crochet (DC) in next 7 stitches, for a total of 15 stitches in the first row.


Turn and ch 3. Then DC in same stitch. Work 2 DC in each of the  first row of stitches. (30 st total)


Turn. *Chain 3 and pull up a bead, chain 3 more, making sure you catch the bead. SC in base of chain. SC in next stitch, then repeat from * until all your beads are used. Tie off and work in loose ends.


It's easy and fun to be creative with these. I've used pearl beads in different sizes, acrylic beads in assorted shapes, jade chips,


garnet chips,


amber chips,


or whatever you like. Use same color thread and beads, or contrasting beads, or a variety of colors with a contrasting thread.


Lorie


I will be linking to these parties
Made By You Monday @ Skip To My Lou Craftastic Monday @ Sew Can Do It's So Very Creative @ It's So Very Cheri Mad Skills Monday @ Super Stinky Boys Metamorphosis Monday @ Between Naps on the Porch Motivate Me Monday @ Keeping It Simple DIY Project Parade @ The DIY Show Off Just Something I Whipped Up @ The Girl Creative Modern Craftswoman Monday @ Tools Are For Women Too! Marketing Monday @ Santa's Gift Shoppe  Making the World Cuter Mondays @ Making The World Cuter  Market Yourself Monday @ Sumo's Sweet Stuff Toot Your Horn Tuesday @ A Silly Little Sparrow  Topsy Turvy Tuesday @ I'm Topsy Turvy Tot Tuesdays @ My Delicious Ambiguity Anti-Procrasitnation Tuesday @ A New Nostalgia  Tutorial Tuesday @ Hope Studios Anything Related @ All Thingz Related Show and Tell @ ABC 123 Hoo Are You? @ Night Owl Crafting Show & Tell @ Blue Cricket Design Show Us What You're Working With @ Me & My Bucket Penny Pinching Party @ The Thrifty Home  Link Love @ Tea Rose Home Idea Sharin Wednesday @ Women Who Do It All Make It Yours Day @ My Backyard Eden We Did It! Wednesday @ Sew Much Ado Spotlight Yourself @ It's So Very Cheri Show off Your Stuff @ Fireflies and Jellybeans Strut Your Stuff Thursday @ Somewhat Simple Thrifty Thursday @ Tales from Bloggeritaville I Made It! @ Everything Etsy Transformation Thursday @ The Shabby Chic Cottage Fabric Fun Thursday @ Cheap Chic Home Get Your Craft on Thursday @ Life as Lori It's Stinkin Cute Craft Thursday @ It's So Stinkin Cute Under $100 @ Beyond the Picket Fence Frogs & Snails @ 733 It's Party Time Thursday @ Pony Tails and Fish Scales Hooking Up @ HoH Sew & Tell @ Amy Lou Who Home & Family Friday @ Home is Where my Story Begins  Finished For Friday @ Lit & Laundry Favorite Things Friday @ A Few of my Favorite Things Show & Tell Friday @ My Romantic Home Frugalicious Friday @ Finding Fabulous I'm Lovin It! @ Tidy Mom Flaunt It Friday @ Chic on a Shoestring Frugal Friday @ The Shabby Nest Feature Yourself Friday @ Fingerprints on the Fridge Look at Me! @ Fun to Craft It's a Hodgepodge Friday @ It's a Hodgepodge Life Friday Favorites @ Simply Sweet Home Plant A Punkin Seed @ Punkin Seed Productions Show & Share @ Just A Girl Inspired By @ The Inspired Room Tutorial Linky Party @ Fine Craft Guild Saturday Nite Special @ Funky Junk Interiors Check Me Out Saturday @ A Vision To Remember  Sundae Scoop @ I Heart Naptime Saturday Soiree @ A Little Lovely It's So Very Thrifty @ It's So Very Cheri Share Your Faves @ It's A Blog Party  Weekend Wrap-Up @ Tatertots & Jello