Wednesday, October 6, 2010

Sundae Smorgasbord

Last week my family had an occasion to celebrate. My oldest son received a mission call to California, San Bernadino. Opening the call that arrived in the mail was very exciting and something I have anticipated for 19 years. So I wanted to have it memorable and decided rather than just reading the call, being excited and going on with life, we must add refreshments that would prolong the celebration. Thus...Ice Cream Sundaes!


We had ice cream (of course), homemade brownie bits, wafer cookies, caramel, chocolate and marshmallow toppings, 10 kinds of candies, cookies, sprinkles and nuts. And no sundae would be complete without spray whipped cream and maraschino cherries.

The topping were displayed in goblets and glassware of varies sizes and shapes. Most were bought at the local dollar store. Even the utensils were displayed in glass with a continuous color scheme of white and red (because it's bold and ROCKS - just like my son).
We had so much fun and I couldn't have gotten it all together without my sweet Amanda's help. Thanks sister!

There are so many occasions when doing a sundae smorgasbord is fun and appropriate - pretty much any gathering of people. What fun for a wedding reception or a simple birthday party with a bunch of teens and tweens.

I suggest measuring your glassware before purchasing the candies - we went a little overboard and I will have enough mini-m&m's to last - well... let's just say...a long while. Good thing I love them:]

Have a great day - with cherries on top!

~jan

I have shared a some of THESE fabulous link parties - thanks ladies.

Tuesday, October 5, 2010

Marshmallow Play-Dough


My husband was recently telling me one of his memories of elementary school... and was excited to share this activity with our 2 year old daughter. And after a successful project, I thought who better to share it with than all of you mommy's & grannies out there!!!

*Caution: when making this activity with children {of any age!} there WILL be messy hands!

To make Marshmallow Play-Dough you will need:
-Large Marshmallows {I used the giant campfire ones, have you seen them? THEY'RE HUGE!}
-Spoon
-Peanut Butter
-Wet wipes for clean up

Give  your child one large marshmallow topped with a spoonful of peanut butter. {Make one for yourself, its fun & yummy!}

Start kneading the two together {this will work best with FRESH marshmallows.}

Keep mixing the ingredients together, the oil from the peanut butter along with the heat of hands will start to break down the ingredients and bind the marshmallow and peanut butter together into a dough.

You will know your close to being done when your hands are no longer messy but, rather clean!

Be patient, this isn't a 30 second process, it generally takes about 5-10 minutes to make the play-dough....well worth the wait & messy hands to clean up!

Give your child some cookie cutters to make fun shapes out of the dough. Then when finished...EAT IT:]

Enjoy doing this activity & snack with your children.

Monday, October 4, 2010

Lovely Log Bench

I love this bench I made with my husband. Love, love, love, love it!


Want to make one? It's pretty... um... hard, and it requires a lot of specialty tools, but here's how! 

Step 1:
Take your chainsaw out into the forest and cut down a {dead} tree. Or two. (You probably need a permit) Really.

(And yes, I used the chainsaw! We have a little pact: he taught me to use the chainsaw; I'm teaching him to sew!)

(You can also buy logs from a logging company, which is where we got the logs for the legs and plank for the seat.) 
Skip peel the logs with a draw knife, removing all of the rough exterior bark and leaving some of the inner bark - however much you think looks cool. (To me, less bark is definitely more!)


(skip peeling)
(Yes, I know I am not wearing proper PPE, but I don't love shoes.)


Step 2:
Prepare the base of the bench for assembly. The plank for the seat is 18"x 48"x 3". We drilled holes 3" in from each corner for the legs with a 1.25" forsner bit, cut the legs 20" and cut the tops with a 1.25" tenon cutter to fit in the drilled holes. 


(tenoning the legs)


Then cut the bracing, tenoned the ends and fit them to the legs.


Forsner bit:

Tenon cutter: 


(It's like a great big {pencil} sharpener for your drill! You can get forsner bits and tenon cutters from Rockler)


(When working with logs, you have to do a lot of eyeballing and guesstimating. It is hard for me to do this, since I am usually an OCD perfectionist freak, but since no two logs are the same, I have to let go!)

Step 3:


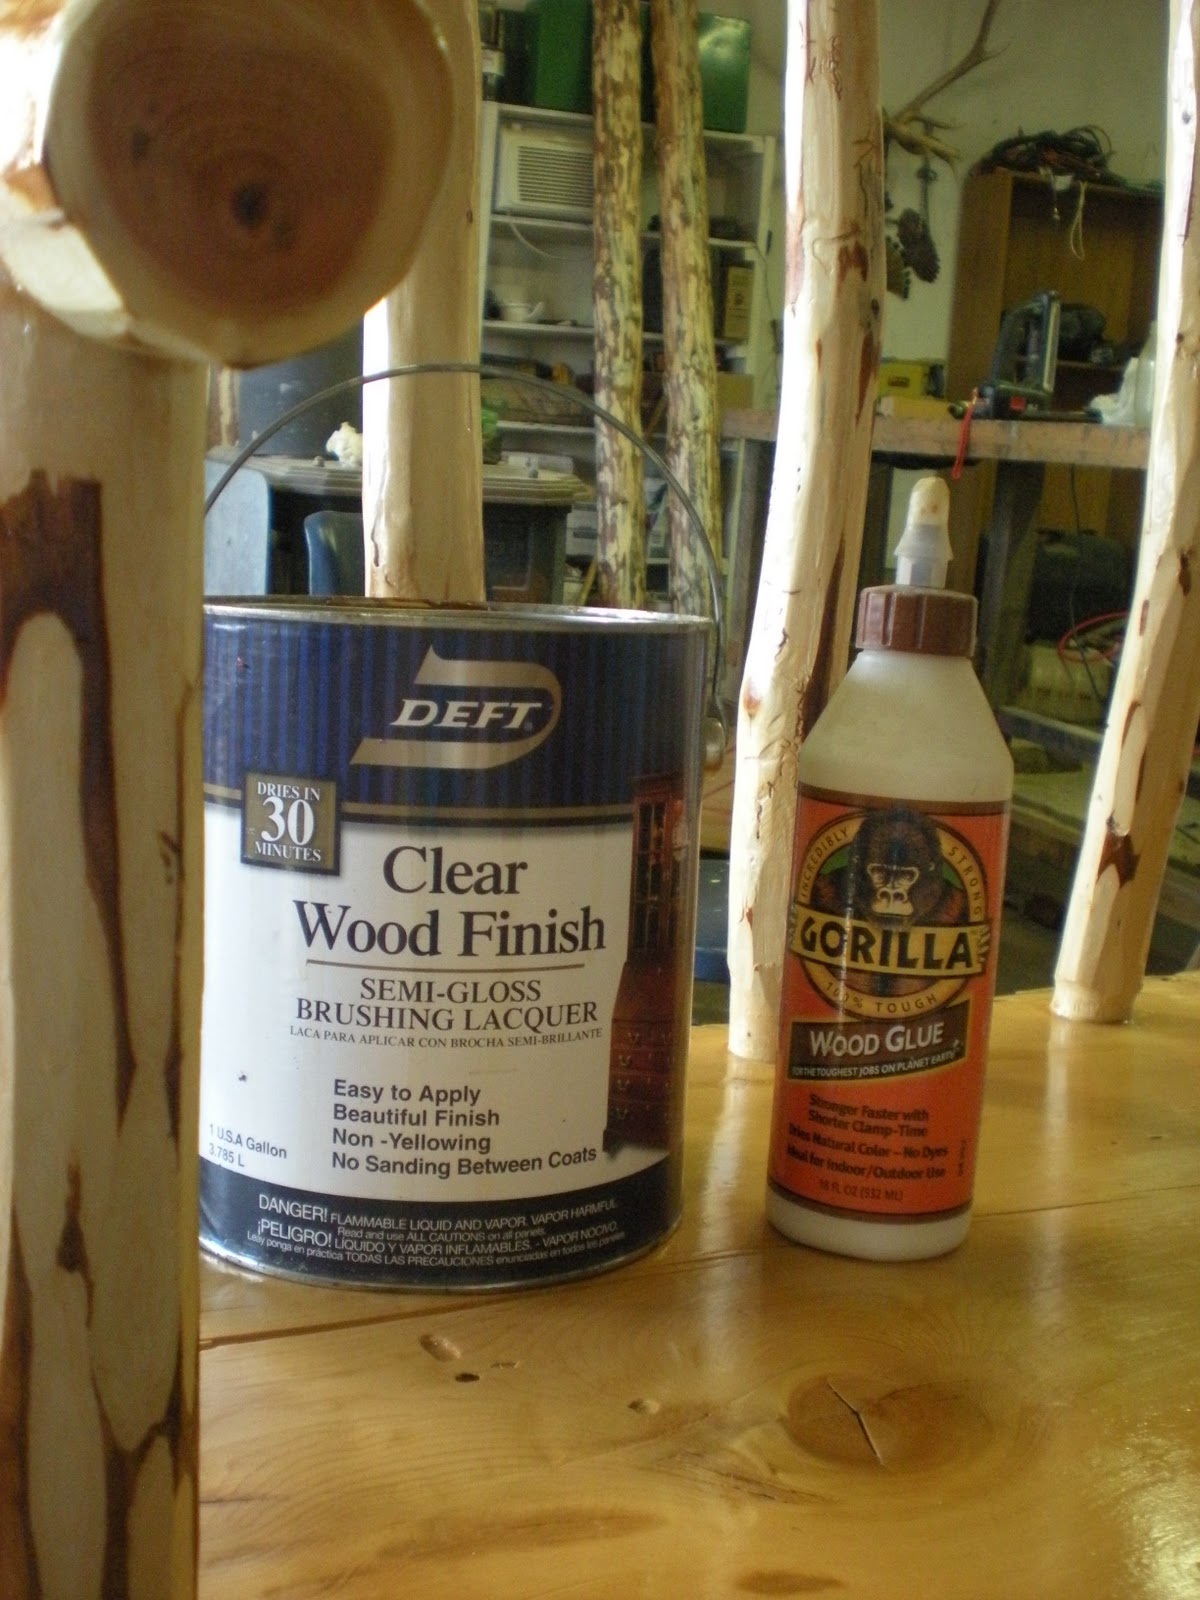
Assemble the base. I counter-sank lag screws to hold the legs securely to the seat, then he attached all the other joints with Gorilla Wood Glue. 
Let dry overnight!

Step 4:
We found an awesome curved limb to use for the top of the back. 


The end pieces were tenoned extra long to fit through the top, and the 5 spindles and the arms were cut to fit.


 We glued it all together with Gorilla Wood Glue, (hurry! the moisture from the glue makes the wood expand slightly, and with this project, we had very {little} wiggle room! oh, and you totally need a craft spotter for this step! It is a two-person job!)


Then I made plugs from a scrap piece of log to cover the lag screws using a hole saw, and glued them in place. Because we used the same wood, it will be virtually {invisible} once it is sanded down. 


Hole saw:

Let dry overnight! (again)


Step 5: 
Sand. Sand some more. Keep sanding! (Including the plugs. Sand them down level with the seat)


Step 6:
Apply several coats of finish. We used Deft Clear Wood Finish over the whole bench; applying several coats allover, and twice as many as that on the seat. 


Step 7: 
Stick your beautiful bench in your garden and enjoy the last few days of {fall}!


UPDATE (P.S)


I have had bunches of emails asking for more information on the tools used for this project. So I feel I must add a disclaimer: I don't own these tools! They are quite expensive, so I borrowed them from my FIL. I also called around, and you can rent tenon cutters, forsner bits and the like from most all-purpose rental places. (You know the kind, they rent everything from chainsaws to nacho-cheese fountains) The one in my town rents them for less than $10 per day.  So if you're interested in making this project, or one like it, look into that before you put out a lot on $$ for tools you may not use that often!


P.S. again - my bench made the Top 10 on the DIY Club (So exciting!) and a guy emailed me wanting to buy it... *giggle*! 

<3 AmberLou


This is my entry for October's Party @ the DIY Club.


DIY Club
and I will be sharing at some of these parties

Saturday, October 2, 2010

Versatile Blogger Award

We received an award from Kimbo @ A Girl and a Glue Gun!


Thanks Kimbo!

Sadly there are rules with awards... here we go!

The Rules:


1. Thank and link back to the person who gave you the award.

(see above) :o) 


2. Share 7 things about yourself.

1) I have a fabric addiction
2) I recently lost 60 pounds
3) My camera is terrible
4) I believe in gratitude and sending "thank you" cards!
5) I had my last baby in my living room, and will be doing that evermore
6) I love love love fresh produce from my garden
7) Seven is my lucky number!

3. Pass the award along to 15 other bloggers who you recently discovered and think are fabulous.

If you haven't checked out these ladies yet, do!

Close to Home (go see her caramel apple buffet!)

Handmade Mommy (I especially love her quilting inspired crafts)

Trendy Pockets (such great crafts!)

Lit & Laundry (I am a bit of a bibliophile, and I heart her Author reviews)

Just Another Hang Up (crazy amazing pillows!)

Christina's Creative Side (Go see her cute party ideas!)

One Little Word She Knew (Natural, healthy product reviews and tips)

Crystal's Craft Spot (Super fun themed Challenges weekly!)

Just Kidding Around Atlanta  (Check out her Puking Pumpkin!)


Ticking and Toile (So cool!)


Singing With Birds (a-MAZ-ing desserts!)

4. Contact the bloggers you chose and let them know about the award.


Check!


<3 AmberLou

Friday, October 1, 2010

Rice Therapy

I recently had a bad abscess that turned out to be an infected cyst. (Don't worry, I'll spare you the gory picture on that one!) My doctor told me to put hot compresses on the lump for 15-20 minutes 3 times a day. I started using a washcloth soaked in hot water, but it cooled far too quickly to leave it on for more than a few minutes. I got tired of running back to the sink every 2-3 minutes, and wasn't thrilled with the water running down my neck. I could have used an electric heating pad or my aromatic Herbal Therapy Pack
but since I live in a hot climate, I really didn't want to heat any more of my body than I needed to.


Soooo, I made myself a little compress bag. I used a piece of scrap fabric about 4" square and made a little pocket about 4x2". Then I filled the pocket with about 2 cups (uncooked) rice and closed up the end to make a rice-filled pillow.


When it's time to apply the compress, I put the bag in the microwave with a cup of water and heat for about a minute and a half. (Heating with a small amount of water makes for a moist compress. If you prefer dry compresses, heat the bag alone in the microwave.) The rice stays hot for 15-20 minutes, and I don't have water running down into my clothes!


I've actually made these kinds of things several times before. My son was an uber-jock in high school and frequently had pulled hamstrings or injured muscles in other parts of his body. He asked for a bag about 8" square that he kept in the freezer, for cold compresses or heated in the microwave for hot therapy. I made channels (see the Herbal Therapy Bag above to see) in his bag (about 2 inches wide) to keep the rice from bunching up too much.


I also made one a few years ago to wrap around my neck when I was having neck/shoulder issues. It was a tube about 12" long and 2" wide.


I got my shoulder issues worked out now thanks to a helpful chiropractor, so now I heat that bag and put it under my bowl when raising bread dough when I'm in a hurry.
These are great, because they're reusable; they only take a few minutes to heat; there's no worry about falling asleep and getting burned/starting a fire as with an electric heating pad; they're not messy or drippy like an ice bag or wet washcloth and they're completely portable. I heat my little one up as I'm ready to walk out the door, and do my compress while riding to work. I can also reheat it at work or where ever I have access to a microwave (church, friend's home etc).


Lorie